 ultimate-guide
How to Process Raw Drone Footage: A Complete Workflow
Table of Contents
- Why Shooting in RAW Format Matters for Drone Footage
- How to Organize Drone Footage for Efficient Processing
- Step 1: Import and Ingest Your Raw Drone Footage
- Step 2: Color Correction and Drone Color Grading Workflow
- Step 3: Build Your Proxy Workflow for Faster Editing
- Best Drone Video Editing Software for Raw Processing
- Step 4: Configure Drone Footage Export Settings for Final Delivery
- Data Backup and Storage Redundancy for Large Projects
- Frequently Asked Questions
Last Updated: August 7, 2026
Why Shooting in RAW Format Matters for Drone Footage
Shooting in RAW format is the foundation of professional drone videography. Unlike compressed video codecs, RAW captures every bit of sensor data your drone records, giving you maximum flexibility in post-production. Aerial footage often contains challenging lighting conditions, bright skies, shadowed ground, mixed exposures in a single frame. RAW preserves the full dynamic range your sensor captured, meaning you can recover detail in highlights and shadows during color correction that would be permanently lost in compressed formats.
A RAW file from a DJI Mavic or Phantom contains roughly 12-14 bits of color information per channel, compared to 8 bits in compressed H.264 or H.265 files. That extra data is your insurance policy, the difference between being able to grade a sunset shot and being locked into whatever the in-camera processing decided.
Gods Eye Drone prioritizes RAW capture for every project requiring color grading or detailed post-production work. This choice adds processing overhead later, but it eliminates the regret of discovering you can't fix a shot because the data was discarded at capture time.
How to Organize Drone Footage for Efficient Processing
Disorganized footage wastes hours in post-production. Before you import anything, establish a file structure that scales with your project volume.
Setting Up Your File Structure
Create a master folder hierarchy that works for your workflow. Start with a project-level folder, then divide by shoot date, location, or client. Inside each shoot folder, separate RAW footage from proxies, finished edits, and exports:
Project_Name/ ├── 01_Raw_Footage/ │ ├── 2026-08-01_Shoot/ │ └── 2026-08-05_Shoot/ ├── 02_Proxy_Files/ ├── 03_Color_Graded/ ├── 04_Edited_Sequences/ ├── 05_Exports/ └── 06_Archives/
This hierarchy prevents chaos when working with multiple drones, cameras, or shooting days. Use consistent, descriptive filenames that include date, camera, and scene information. Instead of "DJI_0001.mov," use "2026-08-01_DJI_Mavic3_RealEstate_Exterior.mov." Descriptive names let you find what you need without opening files to preview them.
Metadata and Backup Strategy
Metadata, capture time, camera model, ISO, shutter speed, GPS location, becomes your reference for understanding what happened during the shoot.
Before importing files into your editing system, copy all footage to at least two separate storage locations: one working drive (fast, local, connected to your edit system) and one offline backup (stored in a different physical location). Hard drive failure is inevitable. Implement the 3-2-1 backup rule: three copies of data, on two different media types, with one copy offsite.
External SSDs are faster than traditional hard drives for working storage. Network-attached storage (NAS) systems work well for team environments. Whatever you choose, implement storage redundancy.
Step 1: Import and Ingest Your Raw Drone Footage
The import phase transitions footage from capture to processing. Most professional editing software, DaVinci Resolve, Adobe Premiere Pro, Final Cut Pro, handles RAW ingest differently, but the core principle is the same: never move or rename original RAW files after import, as this breaks the link between your project and source media.
Many editors create a "scratch disk" or "cache" location where the software stores temporary files, previews, and rendered data. This should be on your fastest drive, separate from both source footage and backup. A fast SSD for scratch space dramatically improves real-time performance when working with high-bitrate RAW files.
During import, set color space and bit depth to match your RAW source material. Most drone footage comes in Rec.709 color space with 10-bit or 12-bit depth. Maintaining this information through the pipeline prevents unnecessary color shifts during processing.
Step 2: Color Correction and Drone Color Grading Workflow
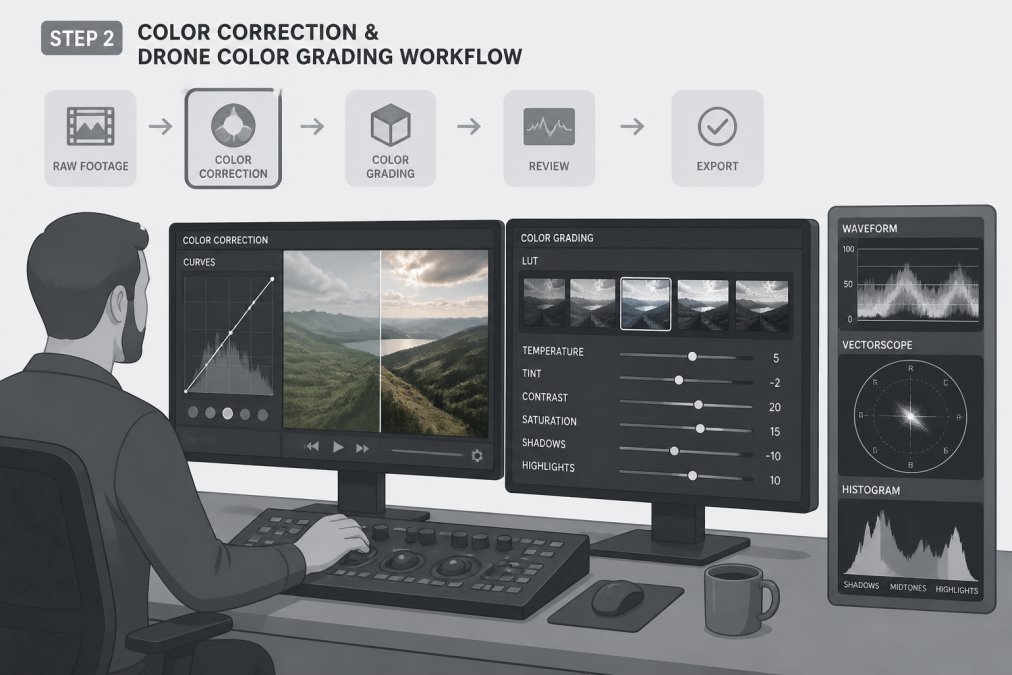
Color correction is technical, fixing exposure, white balance, and contrast to achieve a neutral baseline. Grading is creative, applying a specific look or mood. When processing raw drone footage, correct first, then grade.
Start by analyzing your footage's baseline using a waveform monitor and vectorscope. These tools show whether your blacks are truly black, whites are truly white, and colors are properly saturated. Aerial footage often has a slight blue or cyan cast from atmospheric haze, which is normal.
Apply primary color correction to your entire timeline first. Adjust exposure to bring midtones to the right level, then use curves to fine-tune blacks and whites. White balance correction removes color casts. The goal is a neutral, balanced image that serves as your foundation.
Understanding Log Profiles and Dynamic Range
Log profiles encode video data to preserve maximum dynamic range. Instead of using a standard gamma curve, log encoding spreads sensor data evenly across available bit depth. The result is flat, desaturated footage that contains all the tonal information needed for creative grading.
Many modern drones support log recording modes. DJI drones use D-Log; other manufacturers use variants. When processing log footage, you must apply a LUT (Look-Up Table) to bring it back to normal contrast and color. Log footage without a LUT looks washed out and unusable.
The advantage is dynamic range. Standard Rec.709 preserves detail in a 6-7 stop range; log profiles preserve 10-12 stops or more. For drone work, this is transformative. You're often shooting at high altitude with extreme lighting contrasts. Log gives you tools to handle it.
Applying LUTs and Cinematic Grading Techniques
A LUT is a mathematical transformation that remaps color values. When you apply a log-to-Rec.709 LUT, it converts flat log images into something with normal contrast and saturation. This is your starting point for creative grading.
Use custom LUTs designed for your specific camera and log profile. DJI provides official LUTs for their log modes. Then apply secondary color grading on top for additional creative effects.
Cinematic grading typically involves subtle color shifts that enhance mood, a slight teal cast in shadows and orange in highlights, or desaturated overall images with color-graded highlights. Apply these selectively, to specific shots or scenes. The best grading is invisible; viewers should feel the mood without noticing the grade.
Step 3: Build Your Proxy Workflow for Faster Editing
RAW files and high-bitrate video are resource-intensive. Editing directly from source media causes playback stuttering, dropped frames, and buffering. The solution is proxy files, lower-resolution, lower-bitrate versions that your editing software plays in real time. You edit with proxies, then switch back to high-resolution source files for final output.
Create proxies at 1/4 or 1/2 resolution of your source. If your RAW footage is 4K, create proxies at 1080p. Use a codec like ProRes 422 HQ or DNxHD, which are fast to decode and maintain visual quality.
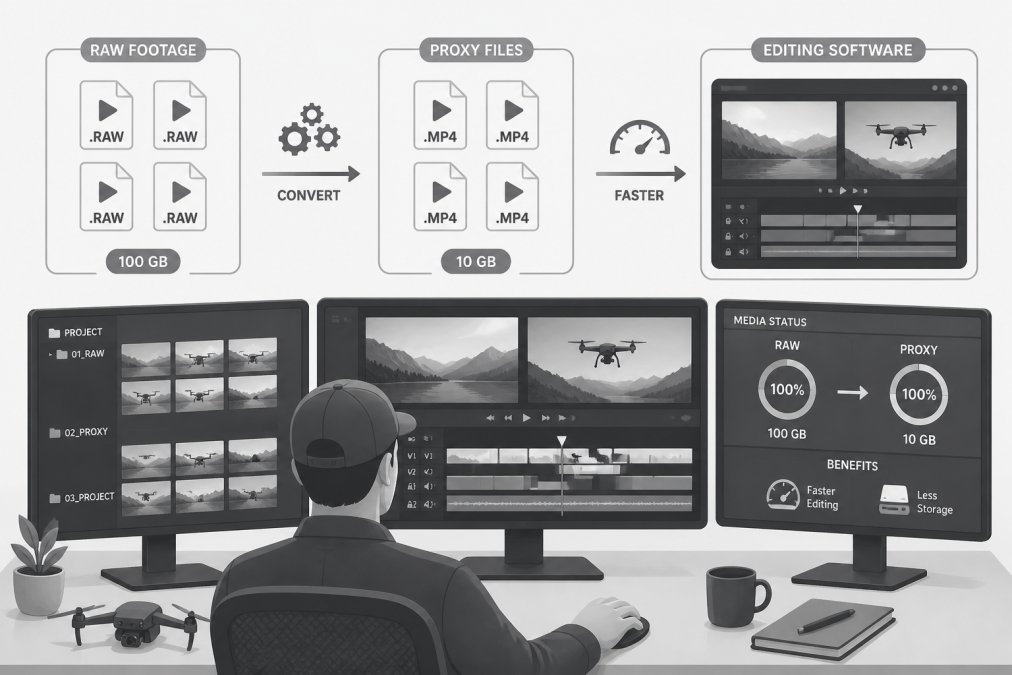
Most editing software lets you set a default proxy location and automatically generate proxies on import. Enable this feature. It adds time to import, expect 2-5x real time, but real-time playback without dropped frames pays for itself within the first hour of editing.
During editing, work entirely with proxies. Your timeline stays responsive, scrubbing is smooth, and effects preview without lag. When finished editing, switch your project to use original high-resolution source files. The software automatically re-links to higher-quality media for final output.
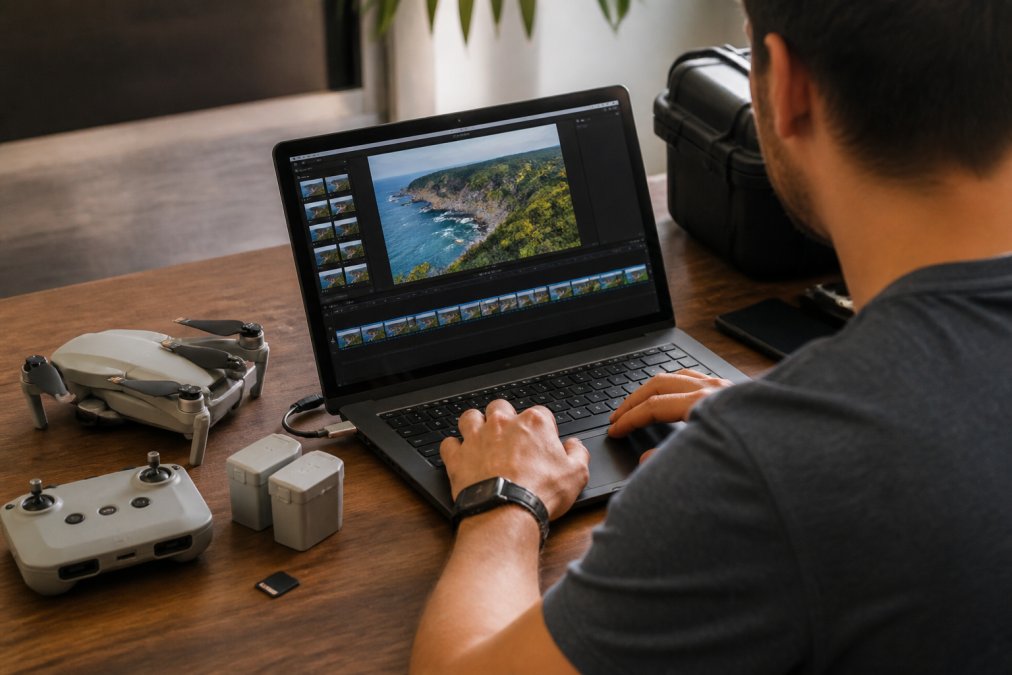
Best Drone Video Editing Software for Raw Processing
Choosing editing software determines your entire workflow. Different tools have different strengths, learning curves, and costs.
Professional-Grade Options for Aerial Footage
DaVinci Resolve is the industry standard for color grading and RAW processing. It handles RAW files natively, includes professional color correction tools, and offers a free version capable enough for most projects. The paid Studio version adds advanced features like fairlight audio, motion graphics, and collaborative tools. The learning curve is steep, but the investment pays off in output quality.
Adobe Premiere Pro integrates with After Effects and Audition, creating a complete creative suite. Premiere handles RAW through plugins and third-party integrations rather than natively, but works well for most drone footage workflows. The subscription model is predictable, and the interface is familiar to many editors.
Final Cut Pro offers native RAW support and excellent performance on Apple hardware. It's a one-time purchase rather than a subscription. For Mac-based workflows, Final Cut Pro is compelling.
Hardware Requirements for Processing Raw Files
Processing raw drone footage demands significant computing power. Your hardware directly affects import speed, grading responsiveness, and export times.
Processor: A multi-core CPU (8+ cores) is essential. Intel i9 or AMD Ryzen 9 processors are standard. Budget at least $800-1200.
RAM: 32GB is the practical minimum for professional work; 64GB is better. Video editing software caches frames in memory to enable smooth playback.
Storage: Your working drive should be fast NVMe SSD, not SATA. Expect 3-4GB/second read speeds. A 2TB NVMe drive for working footage and cache is reasonable.
GPU: Graphics processing accelerates color grading and effects rendering. NVIDIA GPUs (RTX 4080 or better) offer the best performance.
Monitor: Accurate color work requires a professional monitor with wide color gamut and calibration capability. Budget $1500-3000 for a quality reference monitor.
Step 4: Configure Drone Footage Export Settings for Final Delivery
Export settings determine the quality and compatibility of your final deliverable.
Codec, Bitrate, and Frame Rate Decisions
H.264 is the most compatible codec; nearly every device supports it. H.265 (HEVC) offers better compression but older devices may not play it. ProRes is excellent for archival but creates large files unsuitable for streaming.
For 4K delivery, 50-100 Mbps is typical. For 1080p, 15-30 Mbps is standard. Check your delivery platform's bitrate recommendations before exporting.
Frame rate should match your source. If you shot 24fps, export 24fps. Changing frame rate during export requires interpolation, which can introduce artifacts.
Color Space and Render Settings
Rec.709 is standard for broadcast and web delivery. DCI P3 is used for cinema. sRGB is standard for web. Choose the color space matching your delivery platform.
Use maximum quality render settings for final export. Progressive scan (non-interlaced) is standard for modern delivery.
Data Backup and Storage Redundancy for Large Projects
Processing raw drone footage generates massive amounts of data. A single project can easily consume 5-10TB of storage. Without proper backup strategy, you risk losing everything.
Implement the 3-2-1 backup rule: maintain three copies of critical data, on two different media types, with one copy in a different physical location. Automate your backup process using software like Backblaze or Carbonite. Check your backups regularly by periodically restoring a file to confirm it's usable.
Processing raw drone footage is a technical skill that improves with practice. The workflow outlined here, from organization through color grading to final export, is the foundation that professional aerial videographers build on. Whether you're processing footage yourself or working with a professional team, understanding each stage means you can evaluate quality, communicate your vision clearly, and troubleshoot problems. Book Now with Gods Eye Drone to access professional-grade processing for your aerial projects, or use these techniques to build your own in-house workflow.
Frequently Asked Questions
Do I need to shoot in RAW format for drone photography?
RAW format gives you maximum flexibility in post-production, especially for color grading and recovering highlight detail. For professional deliverables, real estate listings, cinematic wedding footage, or inspection documentation, RAW capture preserves all sensor data and prevents quality loss during processing. If you're shooting casual content or working under tight timelines, compressed formats work, but RAW is the professional standard for high-stakes projects where color accuracy and dynamic range matter.
What is the best software for editing drone footage?
Professional options include DaVinci Resolve (excellent color grading and free tier), Adobe Premiere Pro (industry standard with tight Creative Cloud integration), and Final Cut Pro (optimized for Mac systems). For RAW drone footage specifically, DaVinci Resolve excels at color correction and handles proxy workflows efficiently. Your choice depends on your hardware, budget, and whether you need advanced color grading or straightforward editing. Most professionals use one of these three for aerial work.
How long does the raw drone footage processing workflow take from start to finish?
Timeline depends on project scope, file size, and your hardware. Organizing and backing up 1-2 hours of RAW footage typically takes 2-4 hours. Color grading and post-production editing add 8-16 hours for professional cinematic work. Rendering and final export can take several more hours depending on codec and resolution. Gods Eye Drone manages these timelines carefully, contact us for a project-specific estimate based on your deliverable deadline and footage volume.
What export settings should I use for drone footage delivered to clients?
For professional delivery, export at H.264 codec, 8-12 Mbps bitrate minimum (higher for 4K), at your native frame rate (24p for cinematic, 30p or 60p for real estate walkthroughs). Use Rec.709 color space for standard displays. For archival, keep a master file in ProRes 422 HQ or similar intermediate codec. Always deliver in the resolution and format your client requested, real estate agents often need 1080p MP4, while cinematic projects may require 4K ProRes for further editing.
This article was written using GrandRanker