 how-to
Telescopic Pole Camera for Wildlife Observation: Setup Guide
Table of Contents
- What You'll Need Before Setup
- Understanding Telescopic Pole Camera Basics for Wildlife
- Wildlife Camera Placement: Height, Angle, and Field of View
- Trail Camera for Backyard Wildlife: Setup and Positioning
- Telescopic Inspection Camera: Configuration for Animal Observation
- Camera for Observing Animals Without Disturbing Them
- Common Mistakes to Avoid and Field Troubleshooting
- Frequently Asked Questions
Last Updated: October 8, 2026
What You'll Need Before Setup
Setting up a telescopic pole camera wildlife monitoring system requires the right mindset as much as the right equipment. At Gods Eye Drone, we've worked with property managers, agricultural teams, and conservation-minded landowners who wanted to monitor wildlife without disturbing animal behavior.
Start with the basics. You'll need:
- A telescopic pole camera with at least 1080p resolution
- A stable mounting bracket rated for outdoor use
- Batteries or a solar charging panel
Check specifications before purchasing: outdoor durability, waterproof construction, and temperature tolerance matter for equipment exposed to sun and rain.
Understanding Telescopic Pole Camera Basics for Wildlife
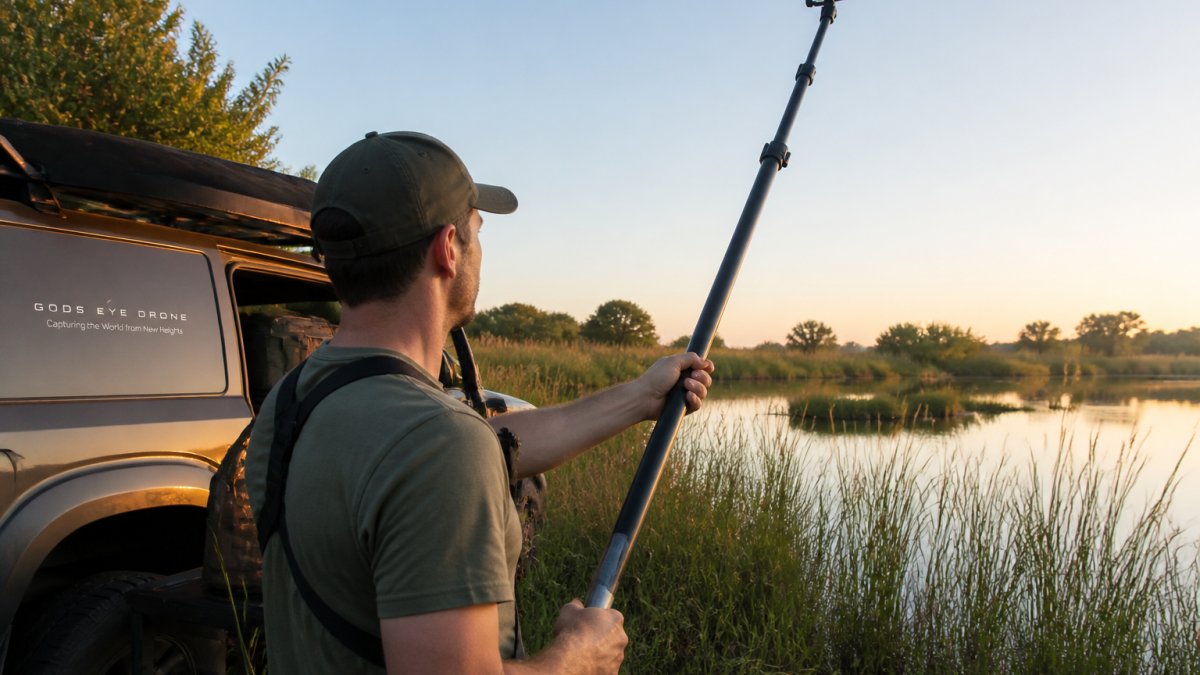
A telescopic pole camera for wildlife combines inspection camera technology with wildlife monitoring capability, extending the camera head 6 to 20 feet above ground without climbing or building permanent structures. Animals behave differently when they see human movement or structures at eye level; a camera mounted high on a telescopic pole captures natural behavior because the pole becomes invisible once positioned.
The camera head typically includes:
- Wide-angle lens (90-120 degrees field of view)
- Night vision or infrared capability for nighttime visitors
- Motion detection triggering
Wireless connectivity varies: some models use Wi-Fi direct to your phone, others connect through cellular networks for true remote viewing. Cellular suits remote areas; Wi-Fi works in backyards.
Wildlife Camera Placement: Height, Angle, and Field of View
Height determines what your camera sees.
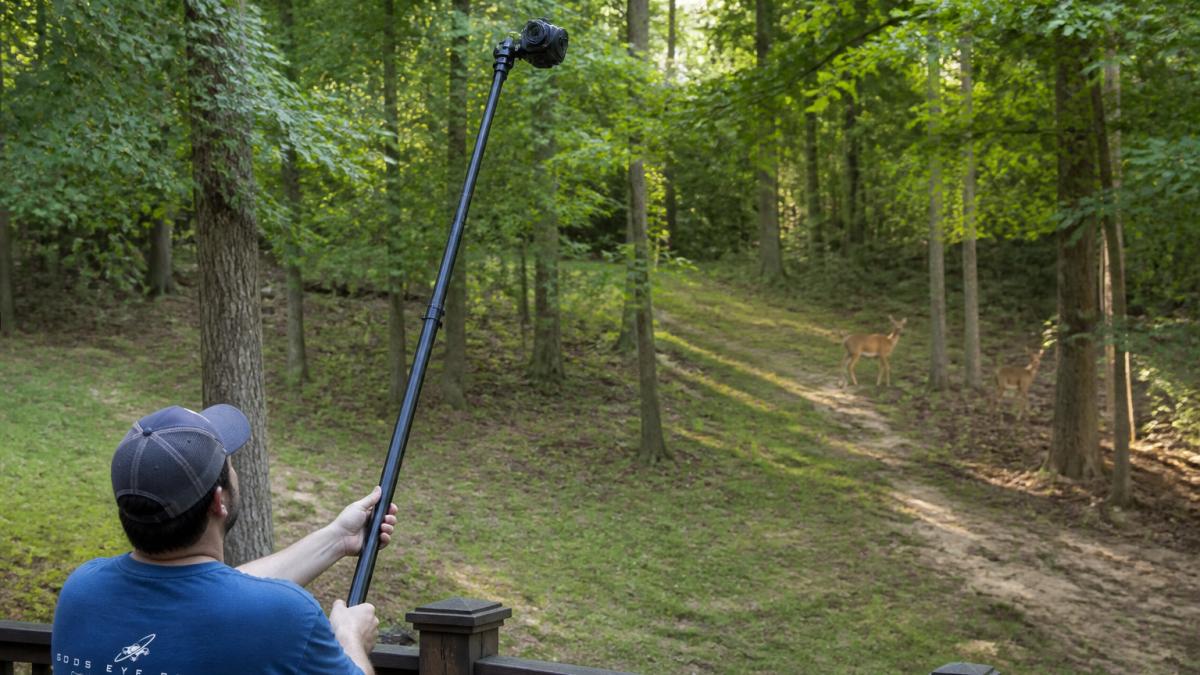
Angle matters as much as height. Point your camera slightly downward, about 30 to 45 degrees, to capture animals passing through; a straight-ahead angle misses animals walking directly below.
Field of view is your third consideration. A 90-degree field captures a wider area but shows less detail; 120 degrees is wider but distorts edges.
Trail Camera for Backyard Wildlife: Setup and Positioning
A trail camera and a telescopic pole camera solve different problems, and the strongest backyard setups use both. The trail camera logs everything on a known route; the pole camera reaches a specific vantage point, a nest cavity, a burrow mouth, a branch over a creek, that a fixed camera can't frame.
Step-by-step pole setup
- Scout the target first, without the pole. Walk the area in daylight, identify the exact feature to watch, a den entrance, a favored perch, a game trail pinch point, and mark where you'll stand the pole.
- Choose a base you can trust. A telescopic pole is only as stable as its footing. A tripod base with ground stakes or a weighted bucket beats leaning the pole against a fence or tree, which transfers every gust into the camera head.
- Mount the camera head before extending. Attach the camera and bracket at chest height, confirm the battery and SD card are seated, and power it on. Discovering a dead battery at full extension means collapsing the whole rig.
- Extend in stages and lock each section. Extend one section at a time, lock it, and check for wobble before moving on. A pole that flexes at full extension will drift off target overnight.
- Aim, then verify on your phone. Watch the live view while you adjust height and angle, frame the target, then tighten the head and re-check, locking a ball head often shifts the frame a few degrees.
- Secure the pole and the camera. Run a cable lock through the mounting bracket and around the pole base. Guy lines to two or three ground anchors cut sway and make the rig harder to walk off with.
- Retrieve deliberately. Collapse from the top section down, supporting the camera head with one hand as you release each lock. Dropping a section under load is how camera heads crack.
Height, distance, and framing for a pole rig
A pole camera earns its keep by getting above the animal's line of sight. For a nest or cavity, position the head level with or slightly above the opening and offset to the side. For a ground trail, 10 to 14 feet with a 30 to 45-degree downward tilt frames the full body and direction of travel. For a burrow mouth, 4 to 6 feet angled down about 20 degrees keeps the entrance in frame.
Stability and weatherproofing on a pole
A pole-mounted camera is more exposed than a trail camera strapped to a trunk. Wind load increases with height, so a 20-foot pole in a 15 mph gust can swing the head enough to blur clips; guy lines and a low center of gravity at the base are the two fixes that matter most. Point the camera so the sun is behind or to the side, and if your housing isn't rain-rated, add a shroud that overhangs the lens.
Telescopic Inspection Camera: Configuration for Animal Observation
An inspection camera on a telescopic pole lets you watch wildlife without becoming part of the scene, but only if you configure the rig around one principle: the animal should never know the camera is there.
Configure for low disturbance
- Recording mode. Motion-triggered recording saves battery and storage and avoids sifting through empty frames. Continuous recording is worth it only for rare, brief events, a fledging, a den emergence, where you can't risk a missed trigger. Default to motion-triggered at medium sensitivity.
- Illumination. Choose infrared or no-glow IR for nighttime. Visible red or white illuminators are noticeable to many nocturnal animals and can change their behavior. No-glow IR trades a little image brightness for a much lower chance of spooking your subject.
- Audible alerts. Turn off any beep, shutter sound, or notification tone on the camera itself. A phone notification is fine; a camera that chirps at 2 a.m. is not.
Observe without disrupting habitat
Low-disturbance observation is as much about where you stand and when you work as about the camera. A few habits separate a careful observer from a disruptive one:
- Set up when animals are inactive. Midday heat and the hours after dusk are lower-activity windows for many species. Deploy and adjust then, not at dawn or dusk.
- Minimize scent and sound. Approach from downwind, wear quiet clothing, and avoid strong scents, insect repellent, sunscreen, perfume. Most animals react to visual movement and unfamiliar scent far more than steady background noise.
- Keep your distance and let the pole do the work. Stand back, extend the pole, and let the camera close the gap. If an animal freezes, flees, or changes its route, you're too close or too visible.
Legal and ethical considerations
Wildlife observation sits inside rules that vary by species and by land. A few apply broadly:
- Permission. On private land you don't own, get written permission before mounting anything. On public land, check whether the agency restricts camera placement, temporary structures, or off-trail access.
- Protected species and nesting seasons. Many birds and some mammals are legally protected, and disturbing an active nest or den can carry federal and state penalties (Bird nests). If you find one, back off and observe from a distance. When in doubt, contact your state wildlife agency before deploying.
- Privacy. Keep the field of view inside land you're authorized to monitor. A pole camera at height can see over fences into private space; aim it down and inward.
- Baiting and feeding. Placing food or scent to draw animals into frame changes their behavior, concentrates them unnaturally, and is regulated or prohibited in some jurisdictions. Observation is not attraction.
Wireless connectivity for remote observation
Connectivity determines whether you watch live or review later, and it shapes how much you disturb the site. Direct Wi-Fi works within roughly 30 to 100 feet, fine for a backyard rig. A cellular relay lets you view from anywhere but adds a subscription and a device needing its own power and signal. Cloud upload is the most power-hungry option.
Camera for Observing Animals Without Disturbing Them
Low-disturbance observation is the ethical foundation of wildlife monitoring.
Avoid sudden movements when setting up. Animals notice quick activity.
Minimize visible light.
Sound matters less than you'd think, most animals don't recognize human voices or equipment noise as immediate threats.
Position your camera to avoid casting shadows across animal pathways, a moving shadow signals danger to prey.
Distance protects both the animal and your data quality.
Test your setup without animals present.
Common Mistakes to Avoid and Field Troubleshooting
The most common mistake is mounting too low.
Poor angle is the second mistake.
Battery failure kills observation runs.
SD card failure happens when cards are full or corrupted.
Wireless connection drops are fixable.
Condensation inside the lens happens in humid conditions. If you see fogging, open the housing and let it dry. Silica gel packets prevent this, replace them monthly in humid seasons.
Monitoring wildlife effectively requires patience and attention to detail.
Gods Eye Drone helps property managers, agricultural operations, and conservation teams deploy aerial intelligence across their land.
Frequently Asked Questions
How high should a wildlife camera be mounted on a telescopic pole?
Mount your camera 4 to 8 feet high for most backyard wildlife observation. Deer and elk typically move at chest to head height, so positioning the camera at this level captures clear facial details and body language. Higher placement (8-12 feet) works for observing tree-dwelling animals or surveying larger areas. Adjust based on the species you're monitoring and your field of view goals. Test different heights during setup to find the angle that captures the most useful footage.
What's the best way to reduce disturbance when observing wildlife with a camera?
Use motion detection with delayed recording to minimize constant operation, which can stress animals. Position the camera downwind when possible, and avoid bright LED indicators that signal camera presence. Mount the camera on a sturdy telescopic pole away from your movement patterns. Keep the area around the camera clear of human scent by wearing gloves during setup. Use camouflage or neutral-colored housings to blend the camera into its surroundings. Check footage remotely rather than visiting the site frequently, which disturbs wildlife behavior and habitat.
How do you position a camera on a telescopic pole for wildlife observation?
Extend the pole to your target height and angle the camera head slightly downward (10 to 20 degrees) to capture approaching animals at eye level. Position the pole near natural movement corridors like trails, water sources, or fence lines where wildlife passes regularly. Ensure the camera head is secure and won't shift in wind. Test the field of view before leaving the site to confirm you're capturing the area you want to monitor. Lock all extension segments tightly to prevent wobbling, which can blur footage and damage the camera during weather events.
What features should you look for in a wildlife observation camera?
Prioritize motion detection with adjustable sensitivity, night vision or infrared capability for nighttime visitors, and weather-resistant construction for outdoor durability. Look for at least 1080p video resolution, ideally 4K for detailed animal identification. Battery life matters: solar charging extends operation without frequent site visits. Wireless connectivity or cellular options enable remote viewing and motion notifications. Check the camera's field of view specification (typically 90 to 120 degrees) to ensure it covers your target area. Waterproof ratings of IP65 or higher protect against rain and humidity in backyard and field conditions.