 how-to
Drone Roof Inspection for Structural Integrity: A How-To Guide
Table of Contents
- How Drone Roof Inspection Works
- Thermal Imaging for Roof Structural Analysis
- High-Resolution Imagery and 3D Data Modeling
- Assessing Roofing Membrane, Flashing, and Drainage
- FAA Part 107 Drone Inspection Requirements
- Drone Roof Inspection Cost and Service Comparison
- Post-Inspection Maintenance Workflow and Reporting
- Common Mistakes to Avoid in Drone Roof Inspections
- Frequently Asked Questions
Drone Roof Inspection for Structural Integrity: A How-To Guide
Last Updated: August 3, 2026
When facility managers and property owners assess roof condition, they typically choose between sending workers into dangerous heights or scheduling expensive manual inspections. Drone roof inspection for structural integrity offers a safer, faster alternative that captures data traditional methods cannot reach. At Gods Eye Drone, we've helped property managers across the Kansas City region identify hidden structural issues before they become catastrophic failures. This guide shows you how drone roof inspection works, what it reveals about your building envelope, and how to use the data to prevent costly repairs.
According to FAA data on commercial drone operations, over 1.2 million commercial drone operations occur annually in the United States, with infrastructure inspection representing one of the fastest-growing use cases.
How Drone Roof Inspection Works
Drone roof inspection relies on coordinated flight operations, sensor payload management, and real-time data capture.
Flight Planning and Safety Protocols
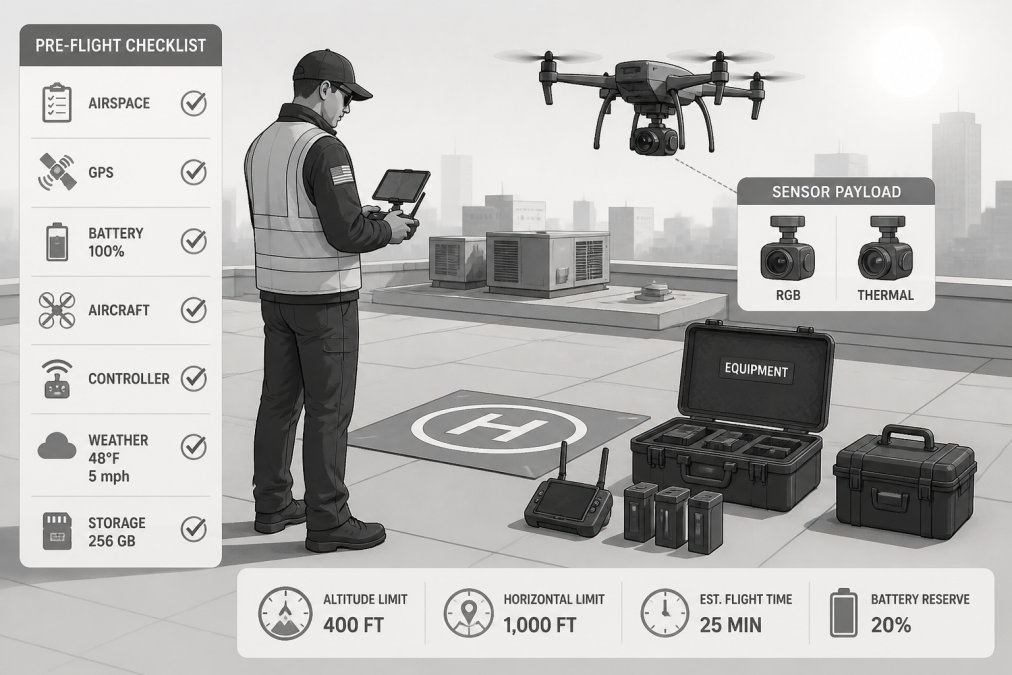
Flight planning determines inspection success. A proper survey requires mapping roof geometry, identifying obstacles, calculating flight paths, and establishing safety zones. Pilots must file a flight plan with the FAA, establish a safety perimeter, and coordinate with building occupants before operations begin.
The preflight checklist includes battery verification, gimbal calibration, weather assessment, and payload confirmation. Wind speeds above 25 mph compromise image stability. A certified pilot evaluates these factors before takeoff. Establish a 50-foot perimeter around the drone's flight zone and maintain direct line-of-sight at all times. Most inspections take 30-45 minutes of actual flight time, depending on roof size and complexity.
Data Capture During the Inspection
The drone captures multiple data streams simultaneously. High-resolution RGB imagery provides visual documentation. Thermal sensors record temperature variations across the roof surface. Some advanced payloads include multispectral sensors for detecting moisture patterns invisible to human eyes.
Flight altitude matters significantly. Lower altitudes (50-100 feet) capture fine detail but require more battery cycles. Higher altitudes (150-300 feet) cover larger areas but sacrifice detail. A balanced approach captures both overview context and close-up structural detail.
Photogrammetry software stitches overlapping images into an orthomosaic, a georeferenced aerial map showing the entire roof as if photographed from directly overhead. This orthomosaic becomes the baseline reference for all subsequent analysis. A single roof inspection generates 300-800 individual image files, thermal data streams, and flight telemetry logs requiring secure storage and backup.
Thermal Imaging for Roof Structural Analysis
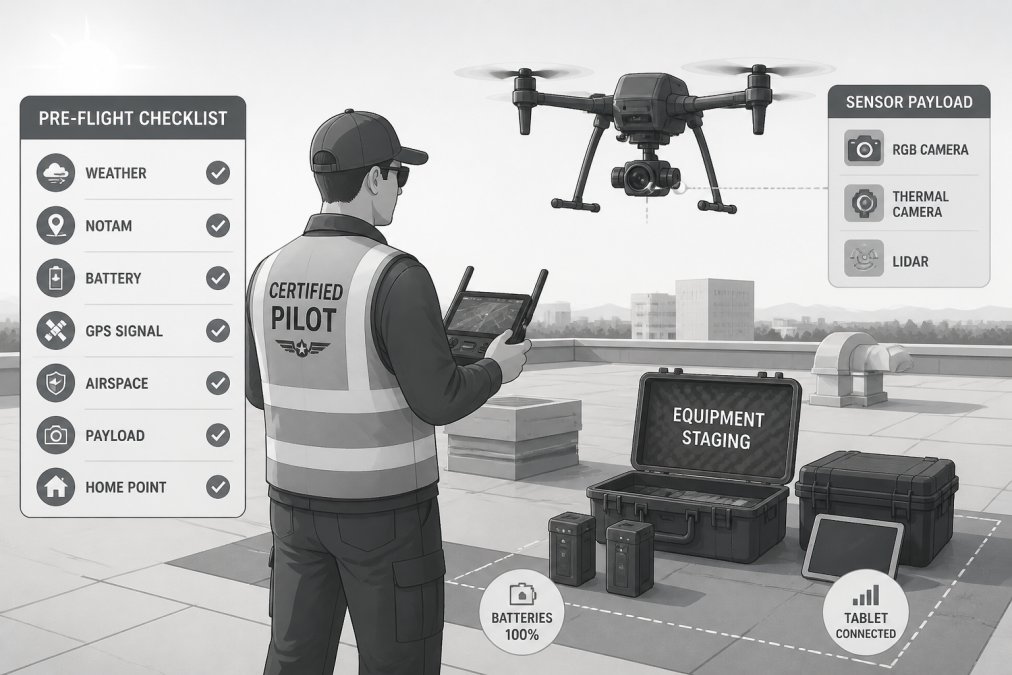
Thermal imaging reveals what visible light cannot: moisture accumulation, insulation failures, and heat loss patterns. A thermal camera detects infrared radiation and converts it into a false-color image where temperature differences become visible. Wet roofing membrane appears cooler than dry areas because water absorbs and retains heat differently.
Detecting Moisture and Hidden Damage
Moisture detection is thermal imaging's strongest application. Water-damaged roofing membrane, wet insulation, and compromised flashing all produce distinct thermal signatures. A thermal image overlaid on visible-light RGB imagery pinpoints the exact location of moisture problems.
Roof membrane blistering, where water vapor becomes trapped and expands beneath the surface, shows as localized warm spots on thermal images. These blisters eventually rupture, allowing water infiltration. Flashing failures at roof penetrations (HVAC units, vents, skylights) create thermal anomalies. Thermal imaging detects these failures early, before water staining appears inside the building.
Identifying Wear Patterns and Defects
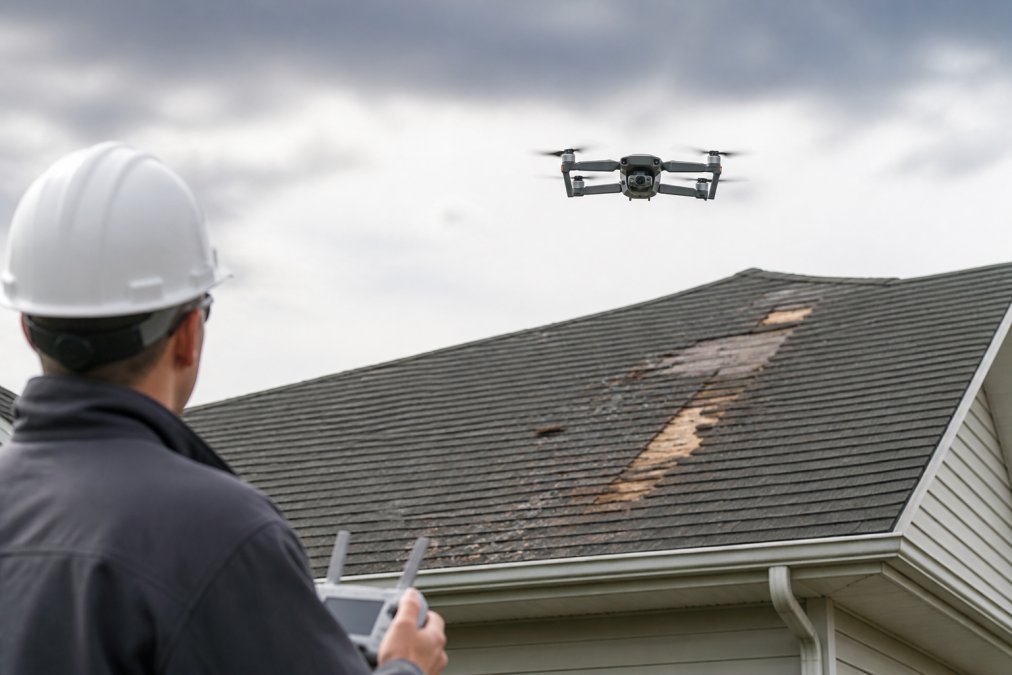
Visual inspection combined with thermal data reveals wear patterns indicating accelerated aging. UV damage to roofing membrane appears as discoloration and brittleness. Ponding water, areas where water collects after rain, creates obvious thermal signatures indicating inadequate roof slope or drainage blockage. Seam separation in membrane roofing appears as linear thermal anomalies where thermal cycling causes fatigue.
High-Resolution Imagery and 3D Data Modeling
High-resolution RGB imagery provides visual context that thermal data alone cannot supply. Modern drones capture images at 20-48 megapixels, revealing fine detail like individual shingles, fastener patterns, and surface texture.
Photogrammetry software processes hundreds of overlapping images to create a 3D model of the roof surface. This point cloud, millions of individual coordinate points representing roof geometry, enables precise measurement of roof slopes, surface irregularities, and structural deformation.
Orthomosaic Maps and Point Cloud Analysis
An orthomosaic is a georeferenced mosaic image where multiple overlapping photos are stitched together and corrected for perspective distortion. The orthomosaic serves as the master reference map for all follow-up analysis. Measurements taken from an orthomosaic are accurate within 2-5 centimeters, depending on flight altitude and camera resolution.
Point cloud data detects subtle deformations, sagging, and structural movement. A roof that appears flat to the eye may actually have a 2-3 inch depression in one section, visible only through point cloud analysis.
Assessing Roofing Membrane, Flashing, and Drainage
The roofing membrane is the primary water barrier. Flashing at penetrations and edges prevents water from migrating into wall cavities. Drainage systems must move water away from the building envelope. Drone inspection reveals the condition of all three components with unprecedented clarity.
Visual Inspection of Key Components
Roofing membrane condition assessment begins with visual inspection of the orthomosaic. Look for blistering and bubbling, cracking and splitting, seam separation, punctures and tears, discoloration and staining, and granule loss on asphalt shingles.
Flashing assessment focuses on roof penetrations: HVAC units, vent stacks, skylights, and perimeter edges. Properly installed flashing overlaps the membrane and slopes downward to shed water. Drainage assessment examines gutters, downspouts, and internal drainage systems for clogs and blockages.
| Roof Component | Visual Indicator | Thermal Signature | Action Required |
|---|---|---|---|
| Membrane | Blistering, cracks, seam gaps | Cooler in wet areas | Repair or replace affected section |
| Flashing | Corrosion, separation, gaps | Temperature anomalies at penetrations | Re-seal or replace flashing |
| Drainage | Debris, standing water, blockage | Cooler areas indicate water retention | Clear debris, upgrade capacity |
| Insulation | Compression, voids, settling | Hot or cold spots indicating gaps | Add insulation or compress settled areas |
FAA Part 107 Drone Inspection Requirements
Operating a commercial drone in the United States requires FAA Part 107 certification. This regulation establishes the legal framework for commercial drone operations, including roof inspections.
Certification and Pilot Qualifications
An FAA Part 107 remote pilot certificate requires passing the Part 107 knowledge test, which covers airspace rules, weather interpretation, aircraft performance, emergency procedures, and safety protocols. The test costs approximately $175. Certification requires renewal every 24 months by passing a recurrent exam or completing an FAA-approved training course.
Specialized training improves inspection quality. Advanced courses cover thermal imaging interpretation, photogrammetry workflows, and structural assessment principles. Gods Eye Drone's certified pilots complete ongoing training to maintain expertise in infrastructure assessment and data analysis.
Insurance and Liability Coverage
Liability coverage protects both the drone operator and the property owner. Typical commercial drone insurance costs $300-$1,000 annually and includes coverage for hull damage, liability, and professional liability. Property owners should verify that any drone service provider carries adequate insurance before authorizing operations.
Drone Roof Inspection Cost and Service Comparison
Drone roof inspection pricing depends on roof size, complexity, data deliverables, and turnaround time. Professional drone services include flight operations, data processing, thermal analysis, and a written report with recommendations.
Professional Service vs. DIY Drone Operations
Professional drone services deliver several advantages over DIY operations. Certified pilots understand airspace restrictions, weather considerations, and safety protocols. They carry proper insurance and process raw data into actionable reports. A professional pilot can complete an inspection in a single visit, process data within 48 hours, and deliver a comprehensive report within one week.
DIY drone operations require purchasing equipment ($1,500-$5,000), learning flight operations, understanding data processing software, and developing analysis skills. For a single inspection, DIY makes little sense. For ongoing inspections across multiple properties, DIY becomes economical after 10-15 inspections.
Data Privacy and Secure Reporting
Drone inspection data includes high-resolution imagery of building exteriors and roof configurations. Establish data handling agreements with your drone service provider specifying data ownership, retention period, access restrictions, confidentiality terms, secure transmission methods, and encryption standards. Gods Eye Drone maintains strict data security protocols with encrypted servers, restricted access, and secure transmission channels.
Post-Inspection Maintenance Workflow and Reporting
The inspection concludes when the drone lands. The real value emerges during data analysis and reporting.
Software Analysis and Actionable Recommendations
Professional inspection reports include an executive summary, visual documentation with defect locations marked, thermal analysis showing moisture and thermal anomalies, 3D model visualization, detailed defect inventory with severity and repair recommendations, and a maintenance roadmap with prioritized repairs and timelines.
The report should be actionable. Rather than stating "membrane shows signs of wear," a good report specifies "blistering detected in northeast quadrant, approximately 200 square feet, recommend replacement within 12 months to prevent water infiltration." Thermal imagery requires expert interpretation by qualified analysts trained in roofing system assessment.
Building Your Asset Lifecycle Plan
A single inspection provides a snapshot of roof condition at one point in time. A comprehensive asset lifecycle plan tracks condition over years, identifies trends, and guides long-term capital planning. Establish a baseline inspection when the roof is new or recently installed. Conduct follow-up inspections every 3-5 years, or immediately after major weather events.
Trending data reveals whether the roof is aging normally or prematurely. Use inspection data to support capital planning. If the roof is approaching end-of-life, budget for replacement. If defects are localized and repairable, prioritize targeted repairs. A well-documented asset lifecycle plan demonstrates due diligence to building insurers, lenders, and future property buyers.
Common Mistakes to Avoid in Drone Roof Inspections
Most failed inspections share common errors. Scheduling inspections during poor weather compromises data quality. Skipping the preflight checklist often discovers equipment issues mid-flight. Flying at inappropriate altitudes either sacrifices detail or exhausts battery life. Misinterpreting thermal imagery without roofing experience may flag false positives. Ignoring data security exposes proprietary information. Failing to document the flight prevents future reference. Neglecting follow-up actions wastes the inspection's value.
Roof condition assessment has traditionally required either putting workers at risk or spending weeks waiting for manual inspection schedules. Drone roof inspection for structural integrity eliminates that false choice. A certified pilot captures comprehensive data in hours, thermal imaging reveals hidden moisture and structural issues, and 3D analysis enables precise measurement and documentation. At Gods Eye Drone, we combine state-of-the-art drone technology, advanced FLIR thermal equipment, and experienced analysis to deliver inspection reports that guide real maintenance decisions. Whether you're managing a single commercial property or a portfolio of buildings, professional drone inspection provides the data you need to extend roof life and prevent catastrophic failures. Get started with Gods Eye Drone and transform how you assess and maintain building envelope integrity.
Frequently Asked Questions
How accurate is drone roof inspection for detecting structural damage?
Drone roof inspections provide precise, high-resolution imagery and thermal data that can identify structural issues like membrane damage, flashing failures, and moisture intrusion. Certified pilots using advanced sensors capture detailed visual and infrared data, enabling structural engineers to assess building envelope integrity with accuracy comparable to manual inspections, without the safety risks of climbing. The data quality depends on weather conditions, sensor quality, and proper flight path automation to ensure complete coverage.
What are the FAA Part 107 requirements for commercial drone roof inspections?
Commercial drone roof inspections in the United States require FAA Part 107 certification. Pilots must pass the FAA's knowledge test, be at least 16 years old, and maintain current credentials. Operations must stay below 400 feet above ground level, maintain visual line of sight, and avoid restricted airspace. Insurance and liability coverage are strongly recommended for commercial work. Gods Eye Drone's certified pilots meet all FAA Part 107 requirements and carry appropriate coverage for infrastructure inspections.
Can drone roof inspection replace a manual roof inspection entirely?
Drone roof inspections excel at identifying visual defects, wear patterns, moisture detection, and overall structural condition through aerial survey and thermal imaging. However, some close-range assessments (sample material testing, penetration checks) may still require manual follow-up. Most professionals use drones as the primary inspection tool, then conduct targeted ground-level verification only where data suggests concern. This hybrid approach reduces safety risk while maintaining thoroughness and cost-effectiveness.
How long does it take to get results after a drone roof inspection?
Turnaround depends on project scope and data complexity. Flight operations typically take 1-2 hours for a standard roof. Processing includes photogrammetry, 3D modeling, thermal analysis, and report generation. Most inspections deliver preliminary findings within 3-5 business days, with detailed asset lifecycle reports and maintenance recommendations following shortly after. Gods Eye Drone prioritizes rapid turnaround for construction schedules and facility management timelines.
This article was written using GrandRanker